Many beauty addicts got their start in the drugstore. My own interest in beauty was first piqued while tagging along with my mom to the pharmacy as a middle-schooler. I fell in love with the transformative promises of skincare, haircare, and makeup, and the drugstore is where I sadly picked up some of my less responsible spending habits.
I decided to completely forgo drugstore makeup in 2018 (and I managed to keep that resolution!) however that doesn't preclude me from being tempted by cheap stuff- whether online makeup brands, drugstore skincare, or deeply discounted higher-end products.
On the face of it, accumulating lots of cheap items doesn't present as problematic as splurging on expensive ones. However, if you're like me, you can justify an expensive haul made up of cheap items, simply because the volume of items acquired seems so impressive.
I can sensibly talk myself out of a single $45 purchase at Sephora, and turn around and spend $60 at Target because my "haul" is multiple products. In theory, getting more bang for your buck sounds great- but in most cases, the bang you get isn't all that amazing. My return/discard rate for drugstore purchases is much higher than the rate for high end purchases.
Pretend the potential purchase is the same price as comparable items in your collection. I've been guilty of buying a $6 highlighter when I own multiple $30 highlighters. And why? I guess to satisfy this itchy feeling that buying a cheap highlighter would be like getting away with murder. But the fact is- if I wasn't willing to invest similar amounts of money in a drugstore item as the expensive version, and I already own an expensive version, the low price tag shouldn't be tempting at all.
Keep a piggy bank. For larger purchases, you might not want to take hundreds of bucks out of your bank account and stash them around the house. But for cheap stuff, go ahead and force yourself to go to the bank, withdraw $20, put it in a piggy bank, and see if you really want to go take that money and spend it at CVS. Many people struggle with money not being tactile and palpable, and by sidestepping the seductive credit card convenience, you will reinforce to yourself that you are spending real dollars that could be spent on better things.
Consolidate drugstore visits. As much as possible, don't make multiple trips to the drugstore in a week. If you need to pick up a prescription, and you're not quite out of toothpaste yet, buy it when you're getting your meds, otherwise you're more likely to come in next week and be tempted by makeup all over again. When I go to the drugstore and only buy one necessity, I have this maddening urge to make the trip "worth it" by buying more stuff. I'm way less likely to browse lipsticks if I have my hands full of backup floss, a case of seltzer, and a new bottle of toilet cleaner.
Make a few ground rules. Maybe you need to avoid the drugstore altogether. Maybe you don't allow yourself to peruse a few tempting brands that constantly disappoint. Or maybe you have to restrict yourself to domestic drugstore makeup only- no eBay orders or international swaps for you! Just like a diet, there are many ways to approach overindulgence. There's no one size fits all solution, but you absolutely do need to give yourself some restrictions. Write a list, and post it somewhere you can see it. If you just have the rules floating in your head, it's easier to bend and break them.
Keep all your receipts. I know, it's a pain in the ass to keep the 5 foot long CVS receipts, but you have to do it. I'm personally more likely to return a $40 foundation to Sephora if I hate it, but I easily let 5 bottles of $8-$12 foundation from the drugstore pile up until I get sick of looking at them, then throw them away. I waste more money and storage space on drugstore makeup I'm too lazy to return, because the price per item is lower. Because most drugstores don't have a sophisticated beauty rewards program, unlike Sephora or Ulta you will always need to bring your receipt along. But at least in the USA you can absolutely return used makeup if you hate it, and you should take full advantage of the return policies in place without any guilt. I keep a cardboard box next to my vanity, and every time I make a new beauty purchase, I throw in the receipt or packing slip, along with the outer packaging if there is any. That way there's no hunting for scraps of paper when I find I need to return an item.
Showing posts with label Tips & Tricks. Show all posts
Showing posts with label Tips & Tricks. Show all posts
1.22.2019
11.29.2018
Free or Cheap Ways to Fix Winter Skin
I love the transition from hot weather to cold, but my skin decidedly does not. Whether I'm living in frigid Scotland or temperate California, my skin protests the changing seasons by erupting in acne (often caused by dehydration) and exacerbated by indoor heating and dryness.
As long as I can remember, every winter that I've been aware of my own skim, I've gone into a moisturizer-buying frenzy when the temperatures dip. Black Friday and holiday sales/new releases only encourage that bad habit. I'm never more gripped by unsubstantiated and overblown marketing messaging than I am when my face is flaking off.
I've noticed a lot of my followers and mutuals on Instagram falling over themselves to bolster their routines with winter's arrival, and they often do so by splurging on new supposedly heavier-duty creams, high-tech treatments, and plsuh-sounding masks. But I've found, for the most part, that's not the most economical or efficient way to save your face. Here are the things that make the most difference for me, in the shortest amount of time, with the least financial outlay:
Shit, get two humidifiers. Put one on your desk at work, and put one on your nightstand for when you sleep. My face starts cracking around my jawline like clockwork the 3rd week of October (coincides with my birthday, thanks for the gift, Universe, you REALLY shouldn't have) and usually I'm too lazy to set up the humidifier until a few weeks later. But when I do set it up, I'm always astounded at the difference I feel in my skin. It's not instantaneous, but within 3 days, I notice increased comfort throughout the day, better makeup weartime, and less irritation and sensitivity when using acids or masks. I live in California- we do not have harsh weather. But most people crank up the heat in their cars, offices, and homes when the temperature starts to drop below their comfort zone (in California, that's under 68 degrees) and indoor heating wrecks even the most resilient of moisture barriers. Don't cry about humidifiers being expensive when I saw your Instagram stories justifying your desperate Drunk Elephant moisturizer purchases! A $60 humidifier will last multiple winters and pay for itself.
Vaseline, Aquaphor, Cerave Healing Ointment, Biafine...there are so many options out there, and they all cost peanuts. During summer you might have the luxury of falling asleep with a whisper of gel-cream, or a light layer of hydrating toner on your face, but in the winter you need a heavy duty arsenal. I use my ointments as sleeping mask, spot "treatments" for dry spots even under makeup, and most importantly, I use them to bolster the strength of my existing every day face creams. By mixing a blob of Cerave Cream (nowhere near potent enough to carry my face through a winter's night) with a blob of Aquaphor, I can make my wimpy day moisturizer into a powerhouse night mask, without shelling out for three "sexy" new night creams that end up disappointing me or breaking me out. If you're not hardcore and you don't enjoy having a literal full face of Vaseline when you fall asleep, you're wrong, but you can do my sleeping mask trick as a final step.
Seriously, if you're not already a facial oil convert, you're missing out. It's [current year] and you have no excuse. There's some debate as to whether facial oils work better when applied BEFORE creams or after. Especially during winter, I say porque no los dos, and I oil-sandwich my night cream and let it all soak in while I slumber. The trick with facial oils is to apply them to not-fully-dry skin (usually I'll press on a layer of toner or gel essence, wait for it to soak in 50-75%, then go in with my oil) and also to press into the skin sparingly. You can always go back and add a few drops, but my skin prefers less oil, layered, rather than a whole puddle of oil slapped on at once. Although my skin loves many lightweight oils like jojoba, green tea seed, and hemp oil in the summer, in the winter I focus on heavier oils like mineral, lanolin, and pomegranate oil. Pure oils are remarkably cheap, even "precious" ones like pomegranate oil. Once I've determined what my skin likes by buying small samples from Garden of Wisdom, I search for bulk suppliers to get the best $/oz. I buy $28 for a pound of pomegranate seed oil. Trust me when I say the investment in oils is worth it, and minimal when compared to purchasing ready made products. My favorite trick is to mix a bottle of 50/50 light and heavy oil (my current go-to combo is green tea seed + lanolin oil) and keep a bottle on my bathroom counter to mix into my routine anywhere I want. It's cheaper than store-bought oils, so you can be really generous and frequent with application. The thing I love most about pure oils is how versatile they are in my routine. I've mixed a few drops of facial oil with my toner as a first step when my skin was raw and dehydrated, but I needed my face to be less greasy for makeup prep. You can apply oil at any point in your routine, mixed or unmixed, and it will do something slightly different. Experiment with "timing" and ratios of oil:other skincare and you'll be amazed at how cheaply you can stretch your routine.
With this I'm specifically side-eyeing your (I'm sure) highly reasonable stack of acids, exfoliators, masks, and treatments. During the winter, your skin will tolerate less. That's just the truth. You're sick more often, you're exposed to harsh outdoor weather and indoor climate control, you're probably eating like crap and sleeping odd hours due to your circadian rhythms getting dicked by the lack of sunlight...give yourself a break. Give your skin a break. This doesn't mean you can't treat acne or aging concerns for half the year, but if your skin is rebelling, and you are throwing more products at it to make it behave, take a beat and think about removing a few steps before you add more. I specifically back way off of BHA usage in the winter- most weeks using it only once instead of 3-4 times like my summer schedule. I also completely swear off all clay masks from October to March, even though I adore them. I tend to avoid all physical exfoliation in the winter. I lean heavily on diluted tea tree oil and azelaic acid as those are the two least-drying but still-effective acne-fighters in my routine. Even glycolic acid, which my normally hardy skin loves, needs to be used with caution because it can cause tightness and itchiness on skin sensitized by winter. The best part about this tip (toots own horn discreetly) is you're encouraged to spend less not more. You do not need to buy One Magical Thing, Darling to fix your face. You need to listen to your own needs and be patient, even if that's less sexy and satisfying than blowing your skincare budget on 5 new cool-sounding moisturizers.
Hi Hungry, I'm Dad! Seriously, this may not be an option depending on where you live or who you share a living space with...but if you can at all avoid running the heat, do it. Not only will it save you money, it will also save your poor dehydrated skin. I run hot, I'll admit, but I bundle up in cozy pajamas and wool socks when I'm bumming around the house in wintertime. I never turn the heat on unless I have an overnight guest who runs cold, and because of where I live, that works for me. Of course this is not a cold turkey directive- if you live somewhere with a more punishing climate, you may need to run the heat. But think about reducing your usage whenever possible. Bundle up more, put an extra quilt on the bed, even use a heating pad or blanket in place of running the forced-air heater. Your skin will thank you.
And keep an extra tube of your favorite cheap face cream as a hand cream. I will admit I tend to wash my hands less in the winter even though I touch my face more. Either from feeling cold, or being annoyed at extra breakouts or dryness, my hands definitely wander to my chin and cheeks more than they should. And clean hands will mitigate the damage to some degree. In addition, washing hands a crapton is the best way to avoid catching cold. Personally, I get sick every single time there's "something going around," but the winter that my mom did chemo, I was so terrified of infecting her with a bug that I washed my hands upwards of 10 times a day. And I didn't get sick that whole year.
I avoid washing my hands in winter for a few reasons- one is that the sensation of cold water is obviously bothersome. Solution: run the hot water if you can. Just do it. The other reason I avoid it is because my already-dry hands feel drier the more I wash. I solve this by keeping a tube of cheapo face cream by my keyboard. This way if I touch my face I don't leave greasy, breakout-inducing hand cream swatches everywhere. Face cream is sufficient for daytime hand dryness and won't provoke more breakouts if I do touch my face.
In the summer, I tend to wear low necklines and use next to no bedding. In the winter, I'm bundled up in scarves, turtlenecks, and you better believe I have my duvet pulled up around my face when I fall asleep. All of these cozy, cuddly items gather dirt and grossness and should be treated as breakout hazards. So be sure to switch out your sweaters, coats, and bedding whenever possible, and spot clean if you can't run them through the machine.
Maybe you think your skin tolerates alcohol all the time- I've been known to insist that. Maybe you know for a fact that you can't use heavy sleeping packs. Changes beget more change. Changes in temperature and habits during winter might affect your skin in unknown ways. Don't be scared to experiment and push the limits a little with how heavy your routine is at night, how much and what products you use, etc. Your skin in summer is not the same as your skin in winter and I know it's scary to play by different rules, but it's better to face facts than to insist your alternate reality is the truth.
I'm a filthy capitalist shill, not a corporate shill. Companies love to lump your bothersome winter problems into a cutesy self-care package that conveniently stuffs into a stocking for the holidays. The truth is, you have more important things to spend your cash on than 5 new moisturizers. Some common sense and holistic self-care (holistic here meaning with regard to your whole person and routine, not just skincare) will do more for your wellness this winter than an advent calendar of travel-sized hydrating lies.
As long as I can remember, every winter that I've been aware of my own skim, I've gone into a moisturizer-buying frenzy when the temperatures dip. Black Friday and holiday sales/new releases only encourage that bad habit. I'm never more gripped by unsubstantiated and overblown marketing messaging than I am when my face is flaking off.
I've noticed a lot of my followers and mutuals on Instagram falling over themselves to bolster their routines with winter's arrival, and they often do so by splurging on new supposedly heavier-duty creams, high-tech treatments, and plsuh-sounding masks. But I've found, for the most part, that's not the most economical or efficient way to save your face. Here are the things that make the most difference for me, in the shortest amount of time, with the least financial outlay:
Get a humidifier
Shit, get two humidifiers. Put one on your desk at work, and put one on your nightstand for when you sleep. My face starts cracking around my jawline like clockwork the 3rd week of October (coincides with my birthday, thanks for the gift, Universe, you REALLY shouldn't have) and usually I'm too lazy to set up the humidifier until a few weeks later. But when I do set it up, I'm always astounded at the difference I feel in my skin. It's not instantaneous, but within 3 days, I notice increased comfort throughout the day, better makeup weartime, and less irritation and sensitivity when using acids or masks. I live in California- we do not have harsh weather. But most people crank up the heat in their cars, offices, and homes when the temperature starts to drop below their comfort zone (in California, that's under 68 degrees) and indoor heating wrecks even the most resilient of moisture barriers. Don't cry about humidifiers being expensive when I saw your Instagram stories justifying your desperate Drunk Elephant moisturizer purchases! A $60 humidifier will last multiple winters and pay for itself.
Ointment up, girl
Vaseline, Aquaphor, Cerave Healing Ointment, Biafine...there are so many options out there, and they all cost peanuts. During summer you might have the luxury of falling asleep with a whisper of gel-cream, or a light layer of hydrating toner on your face, but in the winter you need a heavy duty arsenal. I use my ointments as sleeping mask, spot "treatments" for dry spots even under makeup, and most importantly, I use them to bolster the strength of my existing every day face creams. By mixing a blob of Cerave Cream (nowhere near potent enough to carry my face through a winter's night) with a blob of Aquaphor, I can make my wimpy day moisturizer into a powerhouse night mask, without shelling out for three "sexy" new night creams that end up disappointing me or breaking me out. If you're not hardcore and you don't enjoy having a literal full face of Vaseline when you fall asleep, you're wrong, but you can do my sleeping mask trick as a final step.
Oil is your friend
Seriously, if you're not already a facial oil convert, you're missing out. It's [current year] and you have no excuse. There's some debate as to whether facial oils work better when applied BEFORE creams or after. Especially during winter, I say porque no los dos, and I oil-sandwich my night cream and let it all soak in while I slumber. The trick with facial oils is to apply them to not-fully-dry skin (usually I'll press on a layer of toner or gel essence, wait for it to soak in 50-75%, then go in with my oil) and also to press into the skin sparingly. You can always go back and add a few drops, but my skin prefers less oil, layered, rather than a whole puddle of oil slapped on at once. Although my skin loves many lightweight oils like jojoba, green tea seed, and hemp oil in the summer, in the winter I focus on heavier oils like mineral, lanolin, and pomegranate oil. Pure oils are remarkably cheap, even "precious" ones like pomegranate oil. Once I've determined what my skin likes by buying small samples from Garden of Wisdom, I search for bulk suppliers to get the best $/oz. I buy $28 for a pound of pomegranate seed oil. Trust me when I say the investment in oils is worth it, and minimal when compared to purchasing ready made products. My favorite trick is to mix a bottle of 50/50 light and heavy oil (my current go-to combo is green tea seed + lanolin oil) and keep a bottle on my bathroom counter to mix into my routine anywhere I want. It's cheaper than store-bought oils, so you can be really generous and frequent with application. The thing I love most about pure oils is how versatile they are in my routine. I've mixed a few drops of facial oil with my toner as a first step when my skin was raw and dehydrated, but I needed my face to be less greasy for makeup prep. You can apply oil at any point in your routine, mixed or unmixed, and it will do something slightly different. Experiment with "timing" and ratios of oil:other skincare and you'll be amazed at how cheaply you can stretch your routine.
Use less, not more, skincare
With this I'm specifically side-eyeing your (I'm sure) highly reasonable stack of acids, exfoliators, masks, and treatments. During the winter, your skin will tolerate less. That's just the truth. You're sick more often, you're exposed to harsh outdoor weather and indoor climate control, you're probably eating like crap and sleeping odd hours due to your circadian rhythms getting dicked by the lack of sunlight...give yourself a break. Give your skin a break. This doesn't mean you can't treat acne or aging concerns for half the year, but if your skin is rebelling, and you are throwing more products at it to make it behave, take a beat and think about removing a few steps before you add more. I specifically back way off of BHA usage in the winter- most weeks using it only once instead of 3-4 times like my summer schedule. I also completely swear off all clay masks from October to March, even though I adore them. I tend to avoid all physical exfoliation in the winter. I lean heavily on diluted tea tree oil and azelaic acid as those are the two least-drying but still-effective acne-fighters in my routine. Even glycolic acid, which my normally hardy skin loves, needs to be used with caution because it can cause tightness and itchiness on skin sensitized by winter. The best part about this tip (toots own horn discreetly) is you're encouraged to spend less not more. You do not need to buy One Magical Thing, Darling to fix your face. You need to listen to your own needs and be patient, even if that's less sexy and satisfying than blowing your skincare budget on 5 new cool-sounding moisturizers.
Turn the thermostat down
Hi Hungry, I'm Dad! Seriously, this may not be an option depending on where you live or who you share a living space with...but if you can at all avoid running the heat, do it. Not only will it save you money, it will also save your poor dehydrated skin. I run hot, I'll admit, but I bundle up in cozy pajamas and wool socks when I'm bumming around the house in wintertime. I never turn the heat on unless I have an overnight guest who runs cold, and because of where I live, that works for me. Of course this is not a cold turkey directive- if you live somewhere with a more punishing climate, you may need to run the heat. But think about reducing your usage whenever possible. Bundle up more, put an extra quilt on the bed, even use a heating pad or blanket in place of running the forced-air heater. Your skin will thank you.
Wash your hands way more
I avoid washing my hands in winter for a few reasons- one is that the sensation of cold water is obviously bothersome. Solution: run the hot water if you can. Just do it. The other reason I avoid it is because my already-dry hands feel drier the more I wash. I solve this by keeping a tube of cheapo face cream by my keyboard. This way if I touch my face I don't leave greasy, breakout-inducing hand cream swatches everywhere. Face cream is sufficient for daytime hand dryness and won't provoke more breakouts if I do touch my face.
Wash your clothing and bedding more frequently
Break up with "always never" rules
Be kind to yourself
I'm a filthy capitalist shill, not a corporate shill. Companies love to lump your bothersome winter problems into a cutesy self-care package that conveniently stuffs into a stocking for the holidays. The truth is, you have more important things to spend your cash on than 5 new moisturizers. Some common sense and holistic self-care (holistic here meaning with regard to your whole person and routine, not just skincare) will do more for your wellness this winter than an advent calendar of travel-sized hydrating lies.
5.17.2018
How to Apply Eyeshadow to the Lower Lashline

Defining my lower lashline is a technique I struggled with for a long time. From what I've been hearing- many of you share in that struggle. Because it was such a hard concept for me to understand, I think I developed a pretty good set of guidelines/common mistakes in my own journey. People do not enough, not too much
Build a Strong Foundation
The first step is one that so many people skip- and in my opinion it really shows. You must prime and set your primer well. And I do mean well- most people neglect primer or perfunctorily pat on a tiny amount. Generously prime and set thoroughly with a full layer of translucent powder or skintone shadow. If you don't apply primer, the soft and crepey/lined skin under your lashline will have a snowball's chance in hell of "grabbing" onto shadow and holding it in place. When people tell me they look sick or dead with lower lashline shadow, they usually are not taking the time to complete this step.
I use maybe 25% less primer than I use on the top lid, to cover the lower lashline, but it's by no means a tiny amount. I like to dot it all along the lower lashline with a Q tip and use my pinky finger to blend out. Primer should cover the area where eyeshadow will go and then some so don't be afraid to bring it down further than you think. If you powder your undereyes/foundation/concealer, prime before your powder step. I find applying eye primer on top of powder can lead to clumping.
Setting your eye primer is also a non negotiable step- eye primer itself can range from ultra creamy to a stiff waxy consistency, but if you go directly on "damp" primer with colored powder, you're going to have a streaky bad time. Setting with either translucent face powder or with a skintone-color shadow will not hinder the grippiness of your base, but it will allow for a smooth blending surface for any colors you apply on top.
Use transition shades
 | |
|
Are transition shades "high maintenance?" Sure, but a lot of makeup techniques are high maintenance. The trick to good makeup is to make the end result appear effortless, but this requires far more work than meets the eye.
Transition shades are essential if, like me, you do not have a very 3D eye shape. Whether your eyes are very round, hooded, or flat, you might find yourself craving extra dimension and dynamism. Transition shades can help you with that by carving out more bone structure to make your eye makeup look defined, intentional, and interesting. Tangentially, when you are reading the makeup routines of models and celebrities remember that they have been selected as the top 1% of genetically gifted naturally beautiful and interesting looking people. What they can do with one color on their exceptionally sculpted and defined eyes...might take a bit more time and product for a normie.
This goes for the bottom lashline too. I always use at least 3 separate tones for my lower lashline eyeshadow. This enables me to create a softly blended, smoky appearance with very little work or actual blending. This is a simple technique but hard to put into words. Hopefully the following graphic expresses what I'm getting at:

| Apply lighter colors first, and add darker colors overlapping but not covering all of the last shade |
Remember that there is no single "holy grail" transition shade- it's dependent both on your skin tone and on the specific eye look you are doing. When I do a smoky green look, I use a pale nude, a bright yellow, a mustard yellow, and an acid green as my transition shades before I start going in with darker green. When I do a blue look, I'll use white, a pale gray, a darker gray, a bright blue...and then go in with navy. If in doubt, go monochrome. Do not slap on a brown crease before you do a colorful lid...just because. Think in terms of a color wheel and work within color families to begin. Once your understanding of color and shade has deepened, you can start playing with contrasts.
Apply More Than You Think
Most beauty mistakes/ruts are a result of making erroneous assumptions. People tell me every day "I can't wear lower lashline shadow, it doesn't work on me," or "I can't wear red lipstick ever," and I can tell not only from their pictures that it's untrue, but also because the more definitive/certain a statement is, the likelier it's unfounded. A huge mistake I was making for years is that I didn't apply enough eyeshadow to create definition. *Dwight Schrute voice* What? More shadow to appear less raccoony? Yes, it's true. If you wimp out and apply a thin line of eyeshadow, you might as well not even put anything there. Halfhearted attempts, borne out of a fear of adding too much depth or shadow, will always look wishy washy, unflattering, and unintentional.
Applying your colors lightest to darkest not only gives a beautiful smoky gradient, it also will unlock more confidence. It's really intimidating to go in on a bare eye with a big ol ring of black shadow. It's not that intimidating to apply a large halo of flesh tone, then go in with a slightly smaller ring of medium brown, etc etc. This is not only a good technique to create a speific effect, it will actually give you better muscle memory and understanding of just how low you can go (hint: it's always lower than you think.) Sometimes people will send me their makeup photos on IG or reddit and request constructive criticism- I have never seen someone who brings their shadow too low or has too much drama on a lower lashline. I always see a tentative little crisp line directly under the lashes, and it's an easy fix...just use way more shadow than you feel confident using.
Here are some examples of old looks (left) where I hadn't quite mastered the lower lashline...side by side with looks that show a deeper understanding of shadow technique (right.) Please note the old looks appear less dramatic and that is due to the quantity of shadow on lower lashline. They were not intentionally soft/low contrast, the intention was to create a smoky effect, and I failed. The current examples represent what I intended to do all along. There is still a way to do soft makeup, intentionally, and some examples can be found later in the post.


As Above, So Below
Here are some examples illustrating the principle- if your overall look is soft, you do not always need a smoky lower lashline! Keep things similar in hue and in density/drama. I also broke the rule I explained above in my first "sunset" look with a slightly different color on the lower lashline but I still used familiar transition shades, and kept the finish and saturation level similar. Play around to see what works with your own features. The point is not that you must have a rigidly perfection reflection of your upper lid, but that you should tie in "themes" like colors, finish, placement, to maintain continuity.


Use Multiple Tools
Use multiple tools, and smaller brushes in general- if you try to use one single brush to apply all your lower lashline tones, you'll end up with a muddy ring, regardless of how many colors you use. I absolutely suggest some of the brushes I discuss here, especially the final three. Large blending brushes have no place on the undereye- they can drag color too low, or else blend too thoroughly and destroy your careful placements.
FINISH HIM
If you've followed this process and still feel like it looks a bit wishy washy or not defined enough- you may choose to stamp a very thin line of waterproof pencil or gel liner along the lower lashline. Because you should already have a near-black/smoky shade in that placement as well, the liner will add weight without looking unblended (do not start blending this- you'll muddy everything up.) Waterproof is pretty essential for the lower lashline I've found- on the upper lid, you can get away with a normal product, but the lower lid is prone to smudging, bleeding, and fading. If you're going to use liner at all, make sure it can go the distance.
As for the waterline, you can leave it bare, apply a nude shade, or with a smoky look, apply a black liner. It's up to you. I've included examples above of all 3. You'll need to experiment with various looks to see what each requires. A filled-in waterline can add a touch of crisp refinement and weight, or it can throw off a delicate look.
The final step is to absolutely load up with lower lashline mascara- although this can look spidery or clunky with no eyeshadow, it adds a beautiful drama and final smoky touch to a lower lashline. I'm always wearing an unholy amount of mascara when I'm complimented on my lower lashes- they're nothing special to begin with, but in this situation you can be liberal with application without an unseemly effect.
Closing Thoughts
Most of my readers enjoy ridiculously long-winded advice (YA CAME TO THE RIGHT PLACE) but if you don't, here's a TL;DR:
- Use a lot of primer
- Use at least 3 colors in distinct bands
- You're not applying enough eyeshadow
- Mirror top lid with bottom lid
- Use small brushes
- Don't forget lashes and possibly liner if the look is heavy enough
Do all eyeshadow looks require lower lashline work? No. But many do. It's up to you to find the right balance with a particular look- and even if you think you don't need lower lashline shadow, you can always add some at the end of the day to see how your face would have looked had you chosen to add it. You should grow your inner catalog of reliable looks, so you gain an instinct for which placements are appropriate in what scenarios!
 |
| A look that's deliberately missing lower lashline shadow |
Happy eyeshadowing- if you're not already following me on Instagram, you can find me @faceonomics! Let me know if there are any other technique/general principle posts you'd like to see.
4.19.2018
How to Learn Makeup from YouTube Gurus
I started watching YouTube makeup videos when the community was still a fragile baby bird. It was mostly awkward teenagers using their webcams to record ultra-grainy, unedited videos, sharing their genuine excitement in a brand-new medium. That time is past now, and I do sometimes miss the homegrown authenticity, but of course there are many more recent videos I enjoy for their crisp images and fantastic editing.
I learned a great deal of what I know about makeup from simply watching YouTube tutorials. But today's saturated YouTube beauty field is very confusing for new makeup lovers who don't know where to start.
Healthy, glowy, sunkissed- practically everyone wants to master this look.
I learned a great deal of what I know about makeup from simply watching YouTube tutorials. But today's saturated YouTube beauty field is very confusing for new makeup lovers who don't know where to start.
How to Watch YouTube Videos as a Beginner
Just watching some videos is not going to magically make you better at makeup. Just like sitting through a semester of archaeology lectures won't make you Indiana Jones. You gotta get your hands dirty, practice, and actually walk the walk. Most people watch beauty YouTube videos for entertainment. But if your goal right now is to get better at makeup, here's how.
- Watch beauty experts not just any pretty person with an eye-catching thumbnails. Your goal is to consume excellent material, because as a beginner, it can be hard to unlearn bad habits acquired from not so talented "gurus." There are various experts at different levels of professional development- but make sure not to stray too far into amateur pretty-19-year-old-lifestyle-vlogger territory. Beauty enthusiasts sharing their thoughts as a consumer are a valuable resource when you're more experienced in makeup- but for now they will be a distraction.
- Stay away from review videos, haul videos, and favorites videos (for now!) These are fun to watch, but they are counterproductive to your learning journey. You don't yet know your own product tastes or even what all these products are meant for, so don't make the mistake of being seduced into hauling a bunch of stuff you'll never use. Trust me- in a few months, you will look back at your early wishlist and wonder what the heck you were thinking.
- Follow along with tutorials. When I started doing this, I saw my skills skyrocket much faster than I would have expected. Simply watching someone practice a motion while you follow along with your own tools and products is so helpful, it completely outranks practicing from your fuzzy memory of a tutorial you watched last night. I think most people don't do this- and its importance cannot be overstated. You can pause and rewind, so don't feel limited by the guru's speed or editing.
- Watch with an eye for categories not products. If you end up watching 5 tutorials and thinking each time wow I really need a matte brown pencil for the looks I want to accomplish, then now is the time to shop for a matte brown pencil. Do not decide you need Tarte Shape Tape just because one pretty lady used it, and it looked really nice on her. Most YT gurus make money from promoting product- period- so you cannot rely on what they use as gospel for what you should buy. As a beginner, you will acquire a not-so-perfect makeup stash and that is how you learn what you love. Buy as little as you possibly can, and be open to the idea that you will outgrow products as your tastes and skillset grow.
- Repetition is key. Practice from the same video or few videos for weeks at a time. Do not try a smoky eye on Monday, abandon it for the rest of the week, then try again next Monday and cry that your skills haven't evolved. You will build muscle memory and your own understanding of your face by doing the same techniques many days in a row. For now, you don't get to be Crazy Makeup Lady who wears a different look every day. You get to practice the same basic look for as many days in a row, from the same tutorials, as it takes to nail it down. Then you can use that acquired knowledge for the next look you tackle.
List of YouTubers to Trust
Okay, you're just taking one woman's opinion on this. But you gotta start somewhere! The whole point is to start with a basic, limited list, and as your tastes and skills develop, you don't have to take anybody's advice anymore- you can find what you love all on your own! This is a mix of professionals and amateurs- both have something to offer, but for the most part, seasoned professionals who have experience doing makeup on people other than themselves are your best bet.
Charlotte Tilbury (this is a brand channel, so ignore the products as best you can, just follow along with techniques, as hers are sound)
Karima McKimmie (an amateur who is extremely good at communicating techniques and concepts)
Jaclyn Hill
Samantha Ravndahl (although she's a generic vlogger now and skews more beauty guru than expert, she is another semi-amateur/semi-professional who is excellent at communicating technique)
Samantha Ravndahl (although she's a generic vlogger now and skews more beauty guru than expert, she is another semi-amateur/semi-professional who is excellent at communicating technique)
My Favorite "Beginner Friendly" Videos
How to Apply Lipstick by Rebecca Shores
This is a pretty high-effort tutorial, considering lipstick can just be swiped on in 20 sec. But if you are new to lipcolor, struggling with application fundamentals, or trying to fix asymmetry, this will give you a flawless finish. And you can always tweak the techniques to suit your needs.
Natural Shimmery Summer Glow by Lisa Eldridge
In Depth Bridal Tutorial
You don't need to be planning a wedding to want a special-occasion, flawless, "glamorous natural" look in your pocket. Jaclyn Hill has a big personality, but it's her fundamental, careful technique and solid laymen's explanations that make her an excellent source.
Brows by Lisa Eldridge
There is no such thing as timeless- well- really natural makeup is probably timeless. But Lisa always balances trend and technique- she favors a brow look fixed more in personal flattery- not fixed to a specific dated trend (skinny 90s brows, bushy 80s brows, crisp 2010s brows etc.) For most people, brows are not an accent to be played with- they are more of a foundation piece. You want them to look basically the same most days, and you want them to be the best shape and color for your face. You might play with 10 different shadow placements and color schemes in a week, but it's likely your brow experimentation won't be a focus.
Mary Greenwell's Natural Makeup Masterclass
Again with natural makeup- don't roll your eyes at me! Great natural makeup skills underpin every single successful experimental/funky makeup style. If you don't know the rules of making makeup "pretty" you can never figure out the best ways to break those rules and create interesting makeup. Mary Greenwell has a no-nonsense style which relies a lot on hands, multi use products, and natural earth tones. Like all of the gurus I discussed, her videos are a wealth of information and you can't go wrong following along to any of her tutorials.
Sam Ravndahl's Halo Eye
A technique that is both intriguing and challenging to beginners, the halo eye is a high-impact eye looks that actually takes relatively little skill. However, it's a confusing placement and concept when you haven't tried it before- Sam's videos are excellent for shadow placement as she's very specific in her descriptions, and she zooms all the way in to show where and how she applies each color shadow.
Concluding Thoughts
Most people don't take advantage of the wondrous resource that is Beauty YouTube. They approach it as entertainment, and that's perfectly ok unless you're trying to improve your skills. If you are unhappy with your makeup skills, approach the project like a challenging class or subject in school. Use a variety of trusted resources, study and practice every day, and trust the process. You will not become an expert in a few weeks, but within a few months you can grow your knowledge a great deal.
12.17.2017
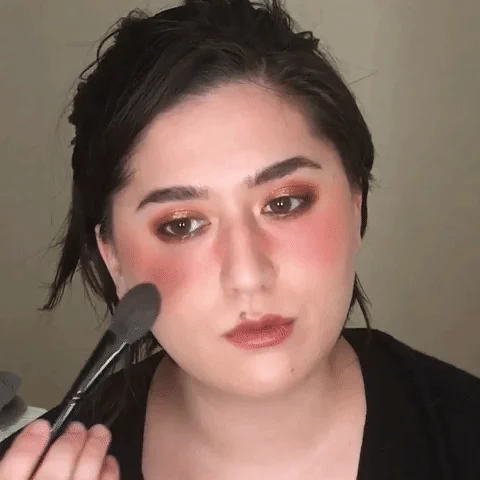
How I Apply Blush: Modified Igari Style
Sometimes I apply my blush in the common Western way- on the cheekbones/apples of cheeks alone. But in 2017 I discovered that I love the way my face looks with a modified igari style. Igari describes a blush trend that originated in Japan and is characterized by concentrated, high placement of bright blush. Usually the blush is placed closer to the eyes or nose in contrast with most Western blush placement trends. The name refers to the fact that it lends a slightly irritated look to the eye area, reminiscent of how you might look with a hangover. Sounds unflattering, but you'd be surprised!
In contrast to the traditional igari style, which keeps the majority of the color directly under the outer third of the eyes, I drag the color across my nose bridge and slightly further down onto the apple of my cheek.
Below are some examples of this blush placement:


I prefer to wear bold and noticeable blush, but the placement can be tweaked for a more natural look (as in the second photo above.) This blush technique takes a bit more time and a few more tools compared to the classic one color apple-of-cheek placement, but it's a great technique to have in your arsenal to switch it up.

First, using your flat brush, apply your bronzer in a swiping motion. Skim the tops of your cheekbones and take it over your nose bridge. Concentrate color directly on the bridge of the nose, and along the outer edges of your cheeks. This is necessary for every look- not only "beach babe" ones. If you are after a very bronzey gold look that day, you can use two bronzers, layering a more intense orange one on top of the first neutral one.
In contrast to the traditional igari style, which keeps the majority of the color directly under the outer third of the eyes, I drag the color across my nose bridge and slightly further down onto the apple of my cheek.
Below are some examples of this blush placement:


I prefer to wear bold and noticeable blush, but the placement can be tweaked for a more natural look (as in the second photo above.) This blush technique takes a bit more time and a few more tools compared to the classic one color apple-of-cheek placement, but it's a great technique to have in your arsenal to switch it up.
What You'll Need

Basic supplies needed for this look
- Bronzer: that suits your skintone- keep it relatively neutral and matte, as you will want it to blend in with your skin
- Nude blush: Matte or slightly satin powder blush 1-2 shades deeper than your natural skintone
- Medium blush: Matte or satin powder blush 3-4 shades deeper than your natural skintone
- Pop of color blush: Matte or satin powder blush in a very vibrant/bright tone- stay away from anything with too much brown or gray in it
- Narrow blush brush: I suggest the Wayne Goss Air Brush or anything with similar head shape. Can substitute a flat paddle shaped foundation brush.
- Fluffy blush brush: Should still be a relatively small head- the Real Techniques blush brush is too large for this purpose. Can be natural fiber (squirrel, goat) or duofibre synthetic. I like the Suqqu Blush Brush best but Chikuhodo Z4 is a good option as well.
- Pointed blush brush (optional): Even narrower than the above two brushes, but with a pointed tip for precise dotting of color. Can substitute a large fluffy eyeshadow brush. I used the Wayne Goss 02 Powder Brush.
Please take special care to coordinate your blush colors. By that I mean you must match the temperature of your blush tones (warm, neutral, cool.) You do not want to have too much contrast in undertone because we are already working with variation in depth, so we will rely on the harmonious tones to carry the look.
If you use something like Hourglass Dim Infusion (a peachy orange nude) topped with NARS Dolce Vita (a rich neutral berry) you will not find it easy to create a harmonious and well-blended but intentional look. Mixing undertones in a complex blush look is possible, it's just not something to attempt before you've practiced the basics.
Before Beginning: Base Makeup
Complete your base routine with foundation or concealer, whatever you like. Take special care to set your foundation in the cheek, cheekbone, and nose area with plenty of powder. You do not want any tackiness or dewiness to remain.
Highlight in the normal fashion (tops of cheekbones) if you like. If you are using mostly luminous/satin blushes, skip this step.
Highlight in the normal fashion (tops of cheekbones) if you like. If you are using mostly luminous/satin blushes, skip this step.
 |
| Highlight (if desired!) |
Step 1: The Stripening
First, using your flat brush, apply your bronzer in a swiping motion. Skim the tops of your cheekbones and take it over your nose bridge. Concentrate color directly on the bridge of the nose, and along the outer edges of your cheeks. This is necessary for every look- not only "beach babe" ones. If you are after a very bronzey gold look that day, you can use two bronzers, layering a more intense orange one on top of the first neutral one.
 |
| Use horizontal tapping and swiping motions with bronzer |
Then take your nude blush and the same brush, and retrace the bronzer placement. Feel free to overlap or go outside the border you created, the bronzer will serve as a guide that allows for a fuzzy pre-blended edge with little extra work. Make sure to only use horizontal strokes. This will serve as the stabilizer for the more tricky vibrant colors you layer on top- the fact that it's a nude blush will mean it will blend itself without harsh borders.
 |
| Striping motions to apply your nude "blush base" |
Step 2: The Sculpting
Now comes time to add some dimension with your second blush color. This time pick up your fluffy brush and apply your second blush in tight, circular motions. Do not cover the entire area of color, but focus on the inner portions of the face. You can sweep/brush the color that you apply outward toward the cheekbone, but focus application on the inner cheeks near your nose bridge. You should also dot the color gently across the nose bridge so the blush on both sides of your face is joined.
 |
| Gentle swirling and soft sweeping |
Step 3: The Pop
You can actually leave your blush as-is after Step 2. However I always add the final touch of a super vibrant blob of blush right under the iris of each eye. This makes the blush look very dimensional, and it also draws focus to your eyes, making them sparkle. The fresh "bloom" of color you see in all the photos at the top of this post are a result of using a saturated, scary blush, sparingly. Use a dotting motion, swirl slightly if needed. Usually very little buffing is necessary as you are placing it over a base of color, which means the edges of your bright blush won't look garish or unblended.
 |
| Adding a splash of vibrant blush finishes the look |
Step 4: Final Blend
If desired, take your original flat brush used for bronzer to smooth out the transitions. It is crucial to keep this step brief and light, because if you blend too vigorously, you will negate the use of multiple blushes, and you will find yourself with a completely uniform haze.
 |
| Keep final blend to a bare minimum |
I hope you enjoyed this tutorial and found it somewhat illuminating. I have been experimenting with this blush placement a lot this year and it is much more versatile than you might think. It also suits a wide variety of face shapes and noses, but individual exact placement will vary slightly. Experiment and let me know if you need suggestions or further pointers.
Please come visit me on Instagram and let me know what types of post you'd like me to do next!
12.05.2017
Current Skincare Routine
 |
| Left: Spring 2016 // Right: Autumn 2017 |
My skin has come a long way in the last couple of years. Part of that is my hormones stabilizing (and they could go haywire again) but I owe much of the improvements to my routine. I rarely post my routine on Instagram because it looks basically the same every single night/morning. Here are the hows and whys of my current morning and night routine- and what changes I've noticed in my skin since these routines have been in place!
Morning Skincare Routine
 |
| Watery antioxidant/prep steps for the morning |
Keywords for my morning routine: Smooth, hydrate, plump, protect.
I wear a full face of makeup every day, so I need my skincare to work in concert with my makeup. I need to look glowy but not greasy, and I want to stop any emergence of flakes or roughness that will mess up the finish of my base.
Stratia Velvet Cleansing Milk: This is halfway between a gel and a cream cleanser. It leaves no residue, but it is not a foaming, squeakifying cleanser. I don't think cleansing in the morning is a necessary step for everyone. When I was actively recovering from dehydration, I completely abstained from a morning cleanse. While this product is important for me to cleanse off the residue from the night before, I can get away with not cleansing some days.
Mizon Daily Clean AHA/BHA Toner: I use this post-cleanse because I rarely use true acids/actives in the morning. Sometimes I want a little smoothing action, and I find this does a gentle job exfoliating but also assists in plumping/hydrating my skin. I don't use this every morning- maybe twice a week.
NIOD Superoxide Dismutase Saccharide Mist: I haven't been shy about my feelings toward the Deciem umbrella of brands, but the SDSM is the one product they make that has become indispensable to me. It functions as an FTE (first treatment essence) in my routine, because it has a watery, fast-absorbing texture. I am allergic to niacinamide, an ingredient found in most FTEs, which promotes water retention in the skin. The SDSM substitutes well, as I noticed less irritation and water loss, as well as quicker healing time since I incorporated it.
Skin Biology 7% GHK-Cu Accelerant: This is a high-priced but not ridiculous (like NIOD) Copper Peptide serum. It is meant to be mixed into any skincare product, and treats my inflammation and irritation. I have noticed an overall calmer, less red appearance when I wake up in the morning since I began using this a few months ago.
Skin Biology 7% GHK-Cu Accelerant: This is a high-priced but not ridiculous (like NIOD) Copper Peptide serum. It is meant to be mixed into any skincare product, and treats my inflammation and irritation. I have noticed an overall calmer, less red appearance when I wake up in the morning since I began using this a few months ago.
 |
| Some light, absorbent hydration to start |
Whamisa Green Tea Serum Toner: I find that my oily and dehydration-prone skin likes some sparing alcoholic skincare, as it soaks in fast and tends to plump and "rubberize" my skin to give me that chok-chok Korean ideal. This toner subtly brightens, soaks in fast, and hydrates my skin while soothing redness.
Dr. Jart+ Ceramidin Liquid: Another quick-absorbing, multi-faceted hydrator that works excellently to combat and prevent dehydration and dullness.
Paula's Choice Redness Relief Toner for Normal to Dry Skin: Although I do not have dry skin, this toner ticks a lot of boxes for me as a morning step. It incorporates some fatty acids and oils which lend emollience and bounce to my skin without loading me up in grease. Soaks in more slowly and acts as a final step heavy hydrator on top of my watery steps.
 |
| Layers of emollient and occlusive ingredients to trap moisture |
Klairs Supple Preparation Toner//CosRx Snail 96 Essence//Stratia Fortify: I do a lot of mixing in my day to day routine, because sometimes nobody makes a single perfect product. For daytime, I think that mixing is necessary to balance the exact level of moisture with the amount of residue you're comfortable with. This combination results in a lightly emollient soothing gel.
Vichy Aqualia Thermal Serum: A longtime favorite of mine, this product has become a daytime must-have for me. It traps the slightly oily and slippery early layers of my routine under a blanket of smooth, siliconey goodness. Acts as a hybrid primer and light moisturizer.
Mizon All in One Snail Repair Cream//Simple Hydrating Booster: On very hot, humid days, I'll skip this last step. However, in the cooler months it's more important. I apply this only on my chin/jawline where I'm most prone to dehydration. See this post for why and how I "zone" my face. This mixture of a thick essence with a very rich siliconey gel makes for a makeup-friendly but dehydration-busting layer of occlusivity.
Skin Aqua Sarafit Silky Essence SPF 50: A high SPF is completely non-negotiable for me. If you care at all about photoaging and hyperpigmentation, you cannot live without a daily SPF. I have been lucky enough to find multiple Japanese sunscreens that work excellently for my daily needs. This is a so-called "commuter" sunscreen- great for the type of sun exposure you'd get driving, taking the bus, and walking to lunch- not suited for outdoor sweating, swimming, or all-day high-UV-index exposure. The best sunscreen is one you will use so spend as much money and time as you need to find the perfect one for you.
Evening Skincare Routine
 |
| My full nighttime cleansing routine |
Keywords for my evening routine: Cleanse, treat, moisturize, strengthen.
Lancome BiFacil Makeup Remover: Technically skincare, although I limit its use to the eye area- this is my holy grail waterproof makeup remover. I use this on a cotton pad when I'm wearing liner, mascara, or heavy eyeshadow. Otherwise, I skip to the next step.
Bioderma Sensibio Micellar Water: I was an oil-cleansing devotee for many years, but in the last 6 months I have found that my skin likes micellar water for a first cleanse. I notice a lot of people leave micellar water on without rinsing, which I find sensitizes and irritates the skin. I use this to remove the bulk of my makeup, then I follow with my second cleanser.
Stratia Velvet Cleansing Milk: My favorite gel/milk cleanser. I need to fully remove all residue of makeup, dirt, and sweat from the day, so I will massage this thoroughly after finishing my first cleanse, and then I rinse with warm water.
Mizon Daily Clean AHA/BHA Toner: Again, I don't use this every single night. But I use it if I'm particularly oily, broken-out, or my skin appears stressed (and not dry at all.) I never believed in acid "toners" that weren't real "actives" before this year, but since I added this I noticed increased clarity, improved skin texture, and better hydration.
[1-3 TIMES PER WEEK] DIY Honey Mask: I like to take advantage of the healing, anti-acne benefits of raw honey using this method. Most commercial "honey" products contain propolis, which I'm allergic to, and I find that using pure honey in a DIY mix is extremely effective for acne care and soothing. The benefits are most apparent if you wear this for at least an hour, so I keep this to a single use per week unless my skin is in extreme distress.
[4-5 TIMES PER WEEK] Acid Treatment: I have oily, congestion-prone skin and overactive hormones, so I do need to do regular acne treatment to keep my skin clear. However, in the grand scheme of things, I'd say I have a fairly light to moderate schedule of actives. I find that exfoliating every single night, no matter how gentle, isn't right for my skin at the moment. I switch between Paula's Choice Skin Perfecting 2% BHA, Alpha Skincare 10% Glycolic Treatment, and Melazepam (20% azelaic acid). I will occasionally double up and use two treatments on one night, but my usual schedule allows for 4-5 total active days, with at least 2 days of "rest" for my skin, when I purely focus on moisturizing.
Whamisa Green Tea Serum Toner
Dr. Jart+ Ceramidin Liquid
Klairs Supple Preparation Toner//CosRx Snail 96 Essence//Stratia Fortify
[1-3 TIMES PER WEEK] Whamisa Organic Flowers Hydrogel Mask OR SNP Bird Nest Aqua Ampoule Mask: I went down the usual Asian Beauty rabbit hole of buying dozens of varieties of sheet masks. Some people enjoy the variety of a large library of masks, but I've settled comfortably on just 2 as my regular treatments. The Whamisa variety is incredibly effective for fixing emerging breakouts, flaky irritation, and dullness. The SNP one is very moisturizing, and when worn on top of my usual essence/oil blend, allows for a super hydrating experience.

Dr. Jart+ Ceramidin Cream OR Avene Soothing Moisture Mask: These two qualify as moderately heavy, hydrating night creams. They are slightly too rich to use in the morning, and they do an excellent job of soaking into my skin over the course of a few hours. I will apply this as my "sealing" step around 6 pm, and then I will leave my final step until bedtime.
Paula's Choice Resist Barrier Repair Moisturizer: This moisturizer contains less than 1% retinol, not enough to truly qualify as a "treatment" step, however it clarifies and smoothes my skin in a way that an inert moisturizer does not. I will usually only use this once or twice per week, on days I am not exfoliating. And if I'm particularly congested, taking a week off acids, or my barrier is compromised, I will use it more frequently.
Emu oil: Vegans, look away! Emu oil is made from liquified, purified fat from an emu bird. It's famously soothing, rarely causes reactions, and is intensely heavy and moisturizing. A sticky, inelegant oil, this makes no sense for morning use, but I love to mix a few drops into my nighttime moisturizer when my skin is extra thirsty. I find mixing a heavy oil into my night creams gives me more flexibility than having a ton of different creams for different moods.
Cerave Healing Ointment//Cerave Moisturizing Cream: Since I posted about this DIY sleeping pack mix early in 2017, I have received so many messages and comments telling me how well it works for others' dehydrated and dry skin types! I find this to be the most effective anti-dehydration barrier out of all the creams and packs I've tried. A sleeping pack is essential if you feel plump when you fall asleep and wake up parched. When I'm sick or dead tired, I will simply do a cleanse and this last step, and I'll wake up looking like a normal human, not a zombie.
And that sums up my routines! A total of 10 steps in the morning and 10-12 steps in the evening. For a complete skincare newbie, remember this particular routine was built over 2 years. A newcomer's routine will include maybe 2-3 products only. My particularly fussy skin demands a high degree of customization- I hope my routine helps you see the potential for great results at all price points and within your own stash.
Bioderma Sensibio Micellar Water: I was an oil-cleansing devotee for many years, but in the last 6 months I have found that my skin likes micellar water for a first cleanse. I notice a lot of people leave micellar water on without rinsing, which I find sensitizes and irritates the skin. I use this to remove the bulk of my makeup, then I follow with my second cleanser.
Stratia Velvet Cleansing Milk: My favorite gel/milk cleanser. I need to fully remove all residue of makeup, dirt, and sweat from the day, so I will massage this thoroughly after finishing my first cleanse, and then I rinse with warm water.
Mizon Daily Clean AHA/BHA Toner: Again, I don't use this every single night. But I use it if I'm particularly oily, broken-out, or my skin appears stressed (and not dry at all.) I never believed in acid "toners" that weren't real "actives" before this year, but since I added this I noticed increased clarity, improved skin texture, and better hydration.
[1-3 TIMES PER WEEK] DIY Honey Mask: I like to take advantage of the healing, anti-acne benefits of raw honey using this method. Most commercial "honey" products contain propolis, which I'm allergic to, and I find that using pure honey in a DIY mix is extremely effective for acne care and soothing. The benefits are most apparent if you wear this for at least an hour, so I keep this to a single use per week unless my skin is in extreme distress.
 |
| My library of actives |
[4-5 TIMES PER WEEK] Acid Treatment: I have oily, congestion-prone skin and overactive hormones, so I do need to do regular acne treatment to keep my skin clear. However, in the grand scheme of things, I'd say I have a fairly light to moderate schedule of actives. I find that exfoliating every single night, no matter how gentle, isn't right for my skin at the moment. I switch between Paula's Choice Skin Perfecting 2% BHA, Alpha Skincare 10% Glycolic Treatment, and Melazepam (20% azelaic acid). I will occasionally double up and use two treatments on one night, but my usual schedule allows for 4-5 total active days, with at least 2 days of "rest" for my skin, when I purely focus on moisturizing.
Whamisa Green Tea Serum Toner
Dr. Jart+ Ceramidin Liquid
Klairs Supple Preparation Toner//CosRx Snail 96 Essence//Stratia Fortify
 |
| My two HG masks |
[1-3 TIMES PER WEEK] Whamisa Organic Flowers Hydrogel Mask OR SNP Bird Nest Aqua Ampoule Mask: I went down the usual Asian Beauty rabbit hole of buying dozens of varieties of sheet masks. Some people enjoy the variety of a large library of masks, but I've settled comfortably on just 2 as my regular treatments. The Whamisa variety is incredibly effective for fixing emerging breakouts, flaky irritation, and dullness. The SNP one is very moisturizing, and when worn on top of my usual essence/oil blend, allows for a super hydrating experience.

Dr. Jart+ Ceramidin Cream OR Avene Soothing Moisture Mask: These two qualify as moderately heavy, hydrating night creams. They are slightly too rich to use in the morning, and they do an excellent job of soaking into my skin over the course of a few hours. I will apply this as my "sealing" step around 6 pm, and then I will leave my final step until bedtime.
Paula's Choice Resist Barrier Repair Moisturizer: This moisturizer contains less than 1% retinol, not enough to truly qualify as a "treatment" step, however it clarifies and smoothes my skin in a way that an inert moisturizer does not. I will usually only use this once or twice per week, on days I am not exfoliating. And if I'm particularly congested, taking a week off acids, or my barrier is compromised, I will use it more frequently.
Emu oil: Vegans, look away! Emu oil is made from liquified, purified fat from an emu bird. It's famously soothing, rarely causes reactions, and is intensely heavy and moisturizing. A sticky, inelegant oil, this makes no sense for morning use, but I love to mix a few drops into my nighttime moisturizer when my skin is extra thirsty. I find mixing a heavy oil into my night creams gives me more flexibility than having a ton of different creams for different moods.
 |
| Sleeping pack to end all sleeping packs |
Cerave Healing Ointment//Cerave Moisturizing Cream: Since I posted about this DIY sleeping pack mix early in 2017, I have received so many messages and comments telling me how well it works for others' dehydrated and dry skin types! I find this to be the most effective anti-dehydration barrier out of all the creams and packs I've tried. A sleeping pack is essential if you feel plump when you fall asleep and wake up parched. When I'm sick or dead tired, I will simply do a cleanse and this last step, and I'll wake up looking like a normal human, not a zombie.
What I Do Not Use
Physical Exfoliants: My face responds well to acids. In my experience, my acne only worsens with scrubbing/manual exfoliation, so I stick to the chemicals.
Foaming Cleansers: While I appreciate the cleansing nature of a true gel-foam cleanser, I think that a gentle double cleanse has done more to repair my barrier and keep it in tip top shape while cleansing thoroughly.
Tretinoin: Currently my skin does not tolerate tretinoin, and I have found full resolution to my severe acne using the above exfoliants. I may begin a tretinoin or retinol treatment in a few years, but for now I am happy with sunscreen and antioxidants as preventative aging care.
"Oil-free" Products: Oil-free was a 90s-era-sham perpetrated on the skincare public! Oils are good- no, oils are great! I never avoid oil in my products, and I will often use a few extra drops of my favorite oil blends when my skin is unhappy.
Eye Cream: I actually have no issue with eye creams generally- I just don't need one right now. I bring my moisturizing products all over my eyelids, and I don't suffer from extreme dark circles, so they are an extra unwanted step for me.
And that sums up my routines! A total of 10 steps in the morning and 10-12 steps in the evening. For a complete skincare newbie, remember this particular routine was built over 2 years. A newcomer's routine will include maybe 2-3 products only. My particularly fussy skin demands a high degree of customization- I hope my routine helps you see the potential for great results at all price points and within your own stash.
12.02.2017
Declutter Tips: How to Destash and Streamline Your Collection
As the new year approaches, there are lots of us reflecting on the beauty items we acquired in 2017, and are feeling a bit sick or overwhelmed with the state of our beauty stashes. If you are looking to declutter and streamline your makeup collection, this post is for you.
I am by no means a minimalist. If you are I suggest you check out the blog and videos of The Anna Edit. She started out on YouTube as a beauty vlogger but has gradually moved to more lifestyle/fashion while transitioning to a very minimalist beauty collection. Her principles and "capsule wardrobe" ethos apply equally well to makeup, skincare, housewares, and fashion.
I am a beauty maximalist. I like to have options and I wear quite a bit of makeup on my face. I don't have a signature face that I wear on the daily, so I can't quite get by with a tiny collection. However, that's no excuse for hoarding or collecting useless products. The goal for me is to have a reasonable stash- and while my "reasonable" might not be the same as yours, there are still some good guidelines that every person can follow or learn from. Here are some tips and tricks that I have based on my experience with decluttering makeup many times over the years...
1. Do not rush to declutter or do it when emotionally compromised.
2. Separate your collection into "keep, maybe, and no" piles.
3. Come up with your own "hard limits" and "soft limits."
4. Place your "maybe" pile in a box and store in a closet for 1 month before trashing.
5. Return all products that you can. Sell any that are worth it. Throw away what's left.
6. Do not declutter and then haul right after, or do it to "make room" for new things.
Do Not Declutter When Emotionally Compromised
I frequently hear people bemoaning the state of their bloated makeup collections, and in a guilt-wracked haze, they trash a huge number of products all at once. This is not a good idea. By decluttering as a means to punish yourself for your past mistakes, you will not learn your lesson, and you are doomed to repeat the error of overbuying.
Bingeing on destashing/minimizing is just as harmful as bingeing on a shopping spree. You are taking the shortcut that you think will lead to happiness or satisfaction. But happiness doesn't ever come about as the result of actions taken in a single moment. Happiness is usually built on repetitive good habits. If you are feeling extremely upset, guilty, or overwhelmed, it is not a good time to go shopping or to tackle your makeup clutter. Do something relaxing and not drastic like taking a walk, a bath, or talking to a friend.
Decluttering is a task, not a journey of redemption, and it should be undertaken when clear-headed and rational. If you are having difficulties approaching your makeup destash with a level head, your first step should be to write out your makeup collection goals. Try to understand what you will use, what you will enjoy, and what you should own before literally dismantling your collection. Once you have made that list, sit on it for a week and see how your perspective changes. Then start your destash.
Separate Your Collection
Every person has holy grail, use-it-every-day items that they don't have to even think about keeping. Those should automatically just go back to your shelf/drawer without worrying. The difficulty comes in separating the products you might still want to keep, and the ones that you should absolutely get rid of. For someone who has a large, unthought-out collection, or trouble letting go, this gray area is the challenge.
When I go to a restaurant with a large menu and can't decide on what I want to eat, I first subtract all the low-hanging fruit options that I definitively don't want. You might only have 1 single lipstick you know you hate, or maybe you have 10 bronzers and you realized you never wear bronzer. Just separate those out right away to get some momentum.
Hard Limits and Soft Limits
What makes sense for one person to keep doesn't for another. All that means is you cannot use somebody's exact rules for yourself. If you wear red lipstick every single day, and you like to wear a different one based on the weather and your outfit, then for you 15 red lipsticks could be reasonable. Wearing each of them at least 5x a year could be your metric for keeping. But if you wear red lips only once a month, and you have 3 red colors that you haven't worn in over 2 months...then your rule for red lipsticks needs to be much stricter.
Your exact time limits and usage rates will vary based on the individual product, so it's helpful to write out a list of your personal rules. Example list, based on my collection and my makeup habits:
1. Lipsticks that have not been worn in over 60 days must go
2. Eyeshadows that have not been worn in over 3 months must go
3. Base products that have not been worn in over 30 days must go
4. Highlighters that have not been worn in over 60 days must go
It's better to come up with these rules first, write them down, and keep them in front of you when you're rummaging through your makeup pile. If you don't have some hard limits, you will always find yourself justifying the items you have some affection for.
If you feel that you are responsible and reasonable enough to handle it, you can also make a list of "soft" limits, which are a bit more wishy-washy and up to interpretation. If you are doubtful about your abilities here, nix the soft limits list and stick to hard limits. Example list of soft limits:
1. Keep 2 dark vampy lipsticks in collection, regardless of last time I wore them, as I will probably wear them in the autumn.
2. Destash 2 out of 3 "funky" highlight colors, keep the last 1 in case I have a costume or festive look to use it for.
3. Keep this lipstick I haven't worn in a year, with the understanding I must wear it at least twice in the next 2 weeks.
Fake Destash
A common fear for people approaching a decluttering project is that they'll all of a sudden need or want the product they threw in the trash, and they won't be able to get it back. Even though this situation almost never materializes, it's important to work with your fears rather than making this a painful process.
Something that has helped me and many other Nervous Nellies is to place your "maybe destash" items into a box, put that box in a hidden place (under the bed, in the closet, in your car trunk) and then not touch the box for a month.
If you find yourself wanting to use a product inside that box, you may remove it, but you may not sift through the box to shop around, and you may not impulsively repatriate your products into your everyday collection.
I recommend setting an alarm for 1 month from your declutter date, and keeping the box of maybes completely out of sight. What usually happens is that you completely forget that box, and you never even think of the products inside it. This can be a very comforting exercise, because it reassures you that you really don't need anything you put in the box. And if you truly end up needing it, well you can always grab it.
Some people extend this to 3 months or 6 months, and if you have the room to store something like that for a long period of time, that's fine. Remember that the longer you go with the item hidden and forgotten about, the higher the likelihood that you do not need it and never need it again.
Types of Destashing
In my opinion, the best thing a recovering makeup addict can do for their future (financial, emotional, etc) is to return every single unwanted item that they possibly can. In the USA this is easy as pie- any store with a membership program will allow you to return items without a receipt even, for between 30-60 days, usually for a refund, sometimes for store credit. Even drugstores will allow this, usually with receipt required but not always.
I know a lot of people have reservations about returning items, and I have written an extensive blog post on the subject. The TL;DR is that guilt over returns is entirely unnecessary, from my perspective, and that if you are currently battling an overshopping issue that affects your life and happiness, returns are a great tool to help you out of your problem.
There will be some products you cannot return. For those, you can choose to gift them, sell them, or trash them. In my opinion, the "gifting" option is quite a big waste of mental energy, and often contributes to denial over how much of a clutter problem you have. I have seen dozens of claims that beauty boxes are a "worthwhile investment" because you can give unwanted mini lipsticks/conditioner samples to friends as gifts. All this does is justify more spending in the future because you have the illusion of a safety net- in reality it's rare to give a used beauty item in a way that is satisfying to gifter and giftee. You are not saving money- if you give your friend nice, thoughtful gifts for Christmas anyway, a used deluxe sample of a random liquid lipstick is hardly going to cut down on your gift list that year. At best you are spending extra money on unwanted items that may work for another person. At worst, you are fooling yourself into acquiring more crap and lying to yourself about what your priorities are.
The exception to this rule is for very beautiful, high-end or expensive products that would genuinely stand alone as a thoughtful gift, that simply didn't work for you. Provided there is no big-time wear, those items can usually be sold or gifted. Because of the terrible resale value of most makeup, it doesn't make a lot of sense to post something for sale online unless the original price was more than $50. Nobody wants a $10 blush or $5 lipstick from an Internet stranger when they can buy it from the retailer for a similar price. Sell items if you feel you can recoup some cost, and give items to beauty-loving friends if they are beautiful or the person has expressed interest in them. Otherwise, trashing is the best option for used makeup.
When you throw a makeup item away, you teach yourself a valuable lesson about the consequences of spending money carelessly. If you feel a twinge of guilt or pain over throwing away something beautiful that you once wanted, you can store that emotion and recall it the next time you are about to buy something just for the heck of it. Maybe you bought that eyeshadow palette because it was deeply discounted, even though you knew you wouldn't get use from it. How much value was it, in the end, despite the discount price? Or perhaps you impulse-bought a lipstick from the drugstore because you had a terrible day at work, but you found the color and formula to be utter crap. Next time you're having a bad day, you might choose a healthier option like going for a walk, having a good necessary cry, or going out for coffee with a supportive friend.
Enjoy Your New Collection
At this point, you have the tools to create the best version of your current makeup collection. The easy trap to fall into is to now start fantasizing about an even better version of what you have. Now that you got rid of so many lipsticks, think of all the new ones that could fit into your drawer! Wrong. This is the time to breathe, "lean in" to what you own, and be invigorated by the fact that you know you love what you have. If you start to bring in new elements, you are only clouding your vision. Think of how crappy you felt the first time you realized you owned too much stuff that you didn't use. Now enjoy that that feeling is gone.
You can always buy new products in the future. But you decluttered for a reason- and that reason sure as hell wasn't "to be able to make room for more clutter." If you find yourself itching to replace old products, revisit the lists you wrote out for soft limits/hard limits. I find that once I've done a destash, a great distraction and reminder of just how awesome my collection already is, is to do a full makeup inventory! That means breaking out the ol' spreadsheet program and cataloging exactly what you own. Figure out what your goals are going forward and arrange your inventory in a way that furthers those goals.
If you want to use up products, keep track of how long you've owned your stuff, and how much progress you've made on each product. If you are determined to stick to a budget, write out all the dollar values of each product you own to grasp how much money is already tied up in your collection. There are so many ways to appreciate what you already have- so don't ruin your fresh and clean perspective by immediately buying more crap.
Subscribe to:
Posts (Atom)